
I've also had a small balcony power plant for about six months now because I was really interested in the topic and wanted to know what potential it offers.
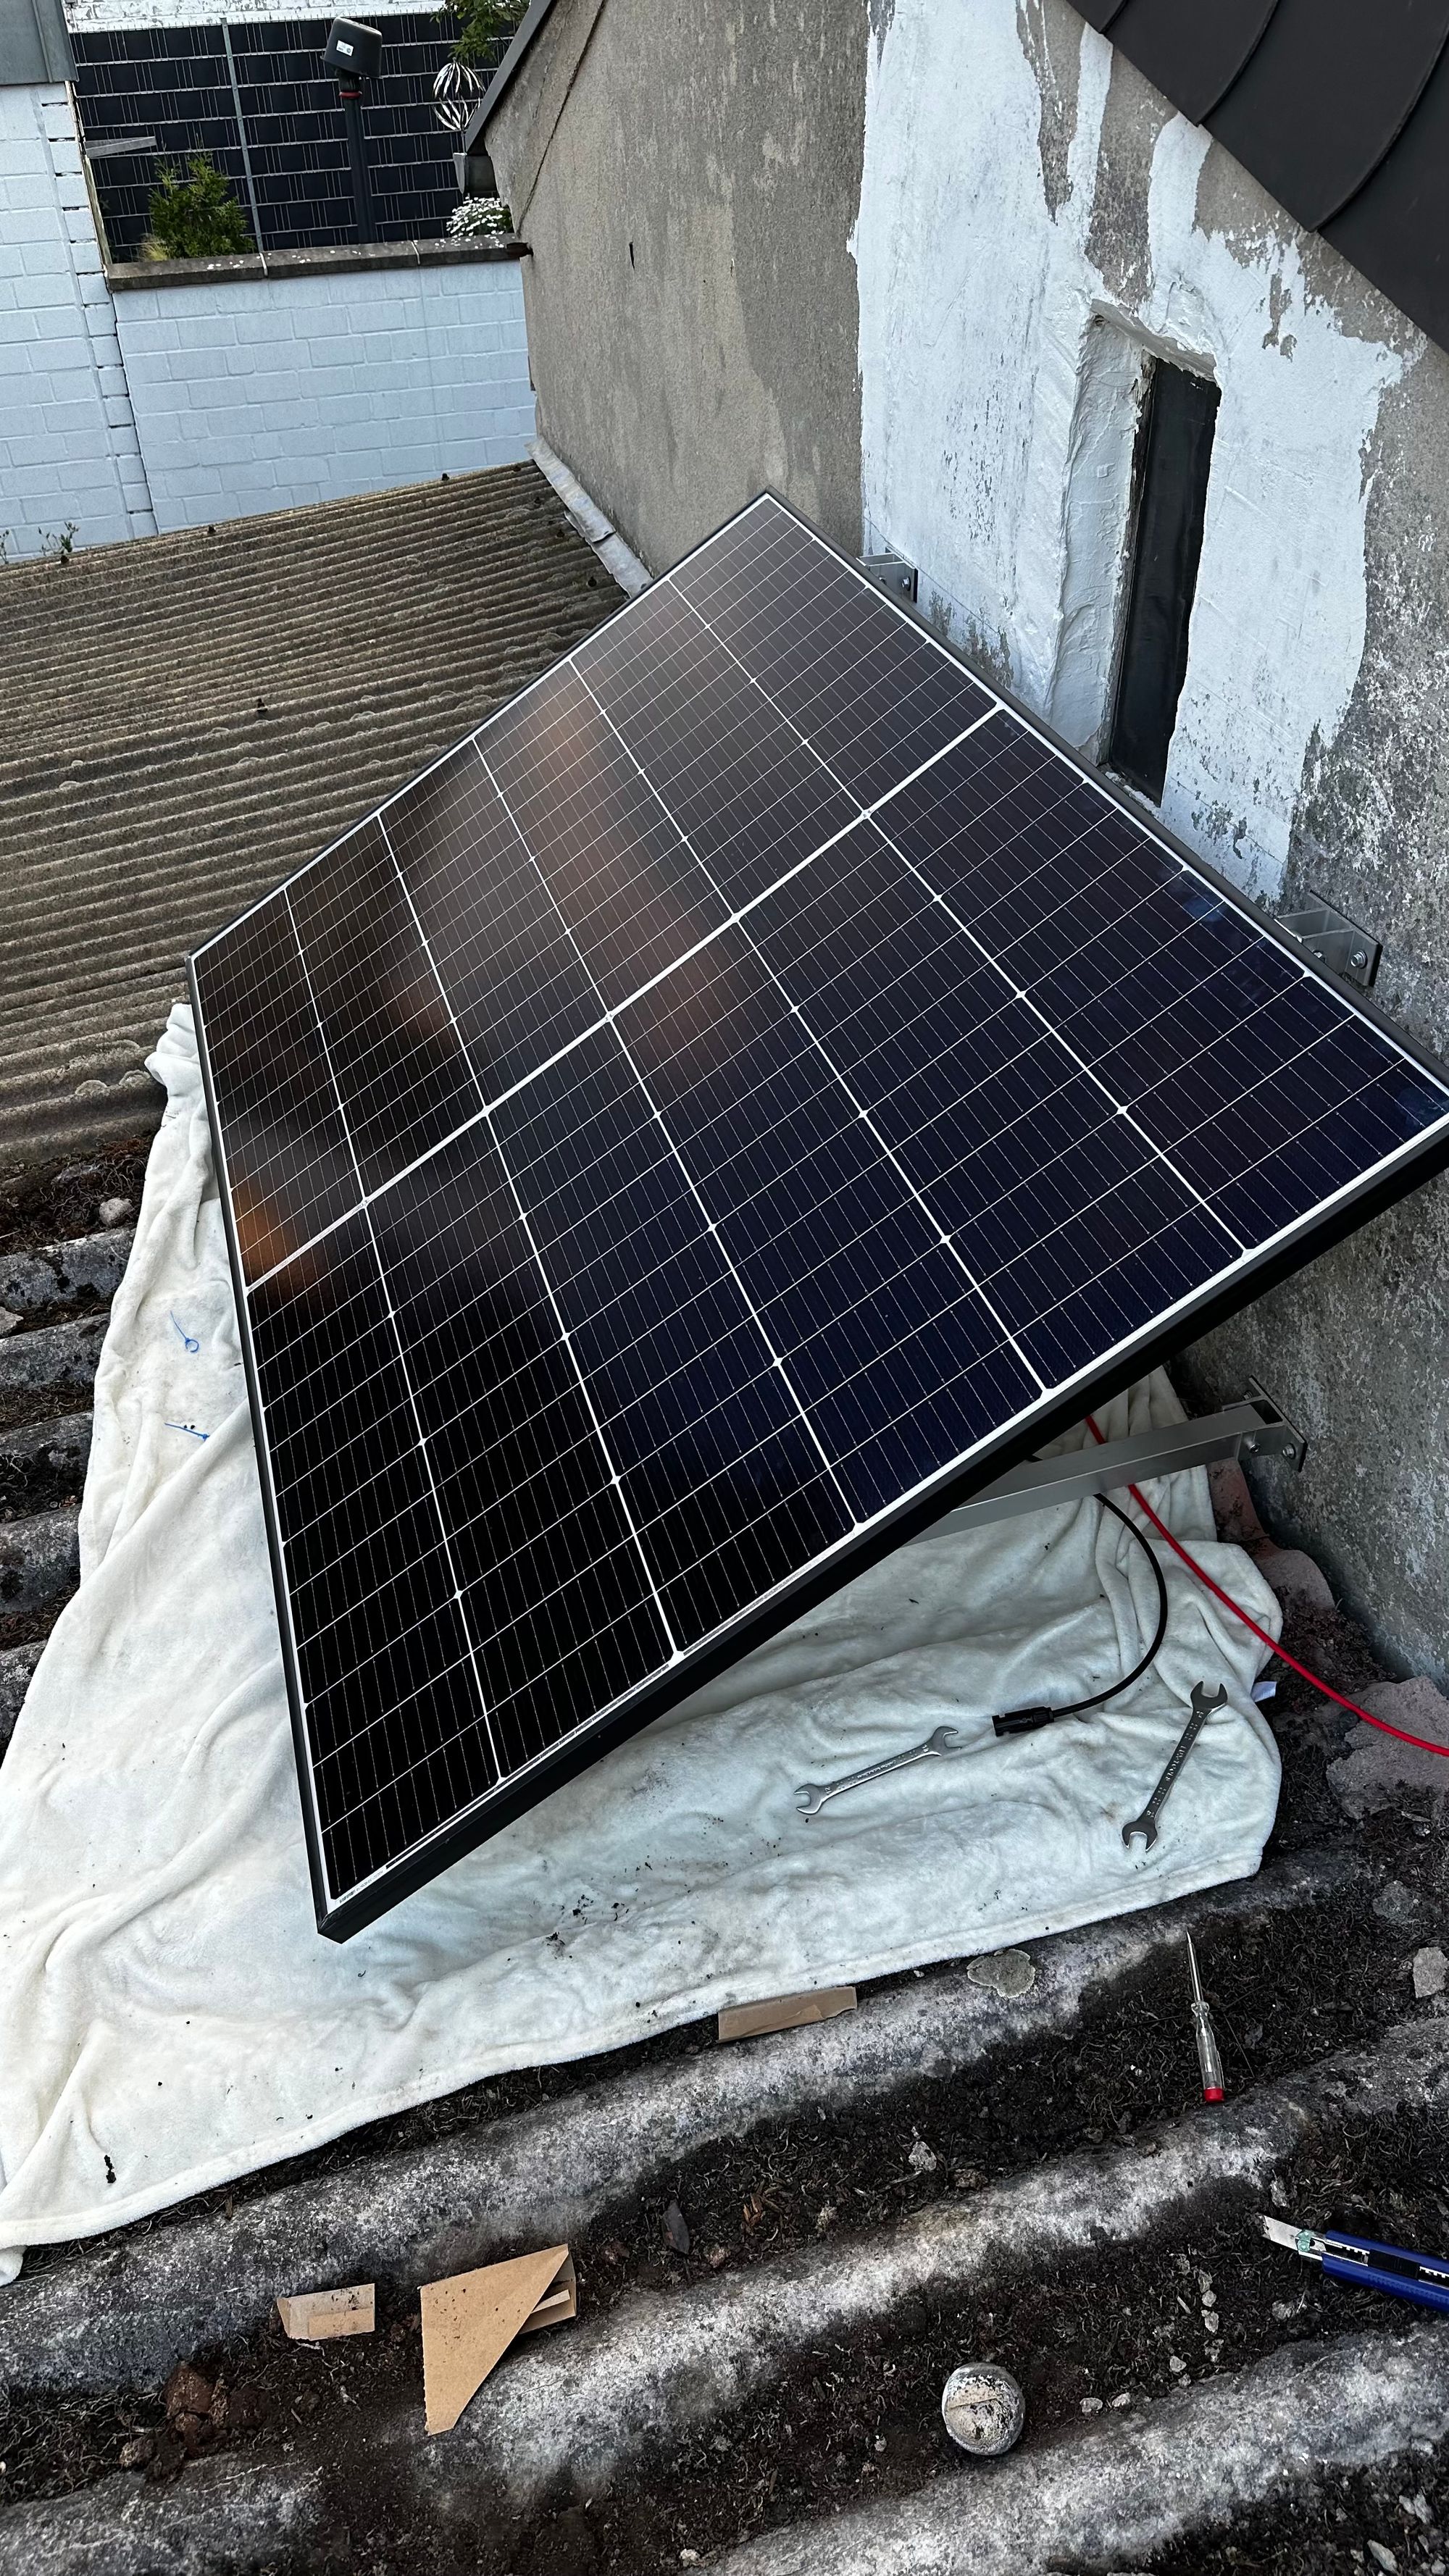
Components of my balcony power plant ☀️
To be honest, I don't have a classic off-the-shelf balcony power plant, such as those offered by ALDI and the like from time to time. Instead, I did a lot of research on the internet to find out which components are good and which inverters do a good and effective job.
Not so long ago, Alternate had some really good offers. There was the Trinasolar solar panel TSWM-DE09R.08W with 425W for just under 146€. I then bought a Hoymiles HM-800 from Offgridtec for just under €169. After I had set everything up, I naturally wanted to read out the inverter via Home Assistant and automate it if necessary.
Hoymiles offers a solution to do just that with the DTU (pro). There are two variants. One is the DTU-WLite for just under 59€ (incl. VAT) or the DTU-Pro for 249€ (incl. VAT).

Wow, I had to let that sink in. Both variants require access to the S-Miles Cloud. Uncool and definitely too expensive.
Open source to the rescue 🆘
And that's exactly why I love the developer community. They don't put up with overpriced products that have a meagre range of functions. They reverse-engineer the product and simply build their own software. This is exactly how the OpenDTU software was created. The nice thing about OpenDTU is that you can not only use it to read out data, you can also use it to set the limit of the inverter, which some suppliers/grid operators require.
 tbnobody
Only a few parts are needed:
- A microcontroller (ESP32 is best)
- A radio antenna (NRF24L01+ or CMT2300A depending on the inverter)
- Soldering iron, stranded wires etc. (or for those who are not so DIY-savvy). (or for people who are not so DIY-minded, a ready-made kit)
- A housing (or a kit with a housing)
All in all, you should spend around €20 on DIY including a housing from the 3D printer. If you want everything ready-made, you might have to spend 30-60€, depending on the supplier. But it's still cheaper than the official "garbage".
Wiring and soldering: DIY is the order of the day 🥽
Unfortunately, you won't be able to avoid assembling and soldering. Whether you order a kit or all parts individually.
Thanks to the instructions in GitHub, however, this can be done quickly and easily if you can solder and already have some experience in this area.
The pin assignments are all very well described here (e.g. for the NRF24L01+):


Please take a very thorough look at this data and the assignments in the documentation and check everything again. I can only warmly recommend it to you:
tbnobodyFor the little bit of soldering I do, a 30€ planer from Amazon is enough, it doesn't have to be a whole Weller soldering station. But make sure that your solder does not contain lead. Lead vapors are not very healthy and can be really nasty.
Once you have soldered everything together, you can go straight to the software.
The microcontroller only tastes fried 🥩
So that the microcontroller now knows what it needs to do, it needs the firmware.
There are several variants for flashing, which are described very well at OpenDTU. Here you should decide on a variant. I personally prefer the variant via the ESP flash tool.
tbnobodyHe's alive! 🧟
If everything went well, OpenDTU will now set up an access point with the SSID OpenDTU-*. You can simply use this with the device of your choice and access the OpenDTU web interface in the browser via the URL http://192.168.4.1.
You must then enter your WLAN and password under Settings -> Network. The access point will then be terminated after 3 minutes and OpenDTU will connect to the specified WLAN.
You can then return to the admin interface via the assigned IP address.
Configure inverter 🛠️
An inverter can then be configured in the admin interface under Settings:
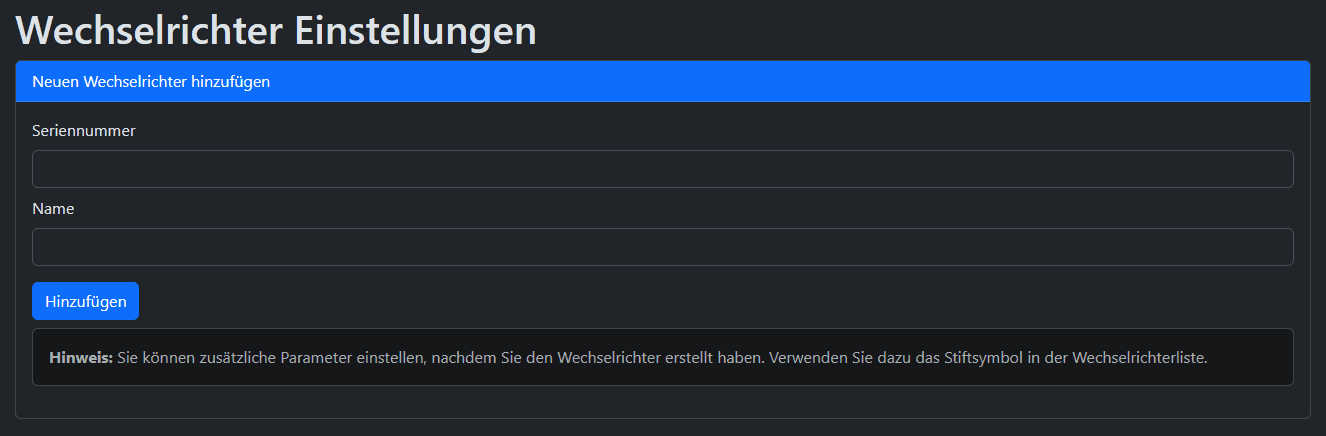
This is absolutely necessary, because without it, the inverter cannot be read out. You can find the serial number on the device itself. As far as I know, this is used to enable practical authentication on the device and to validate that communication with the device is permitted. Otherwise, any neighbor could read your inverter.
The serial number is also used to determine which type of inverter it is and what specifications it has. Once the inverter has been created, you can edit it and make a few more settings here. My settings for the HM-800 look like this:
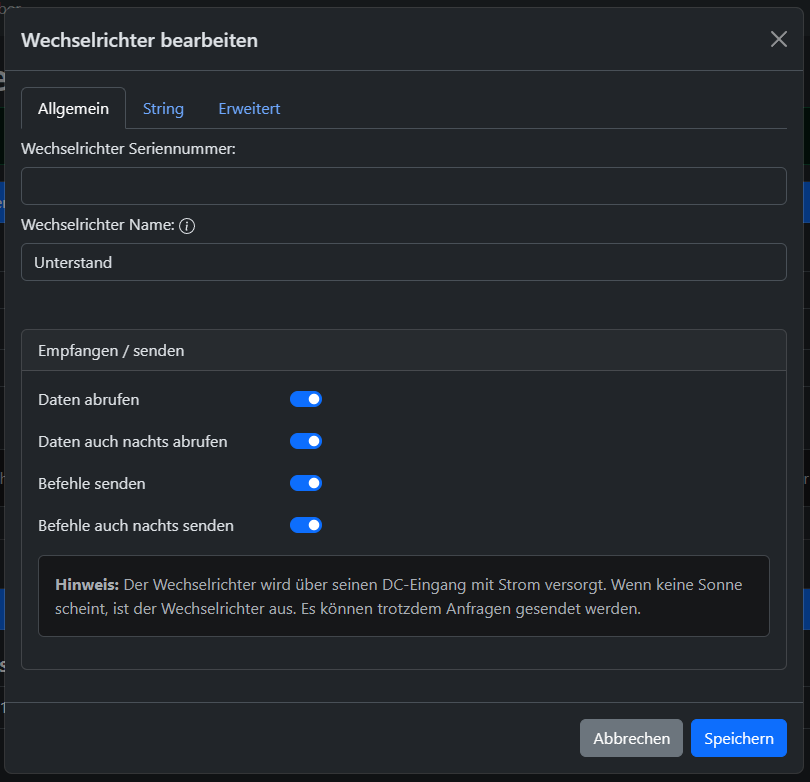
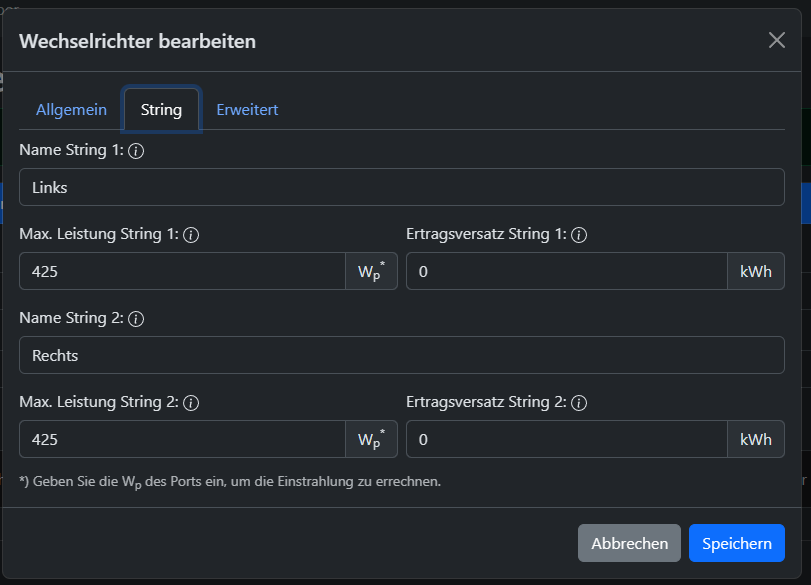
Please adjust the data according to your string/panel. OpenDTU will then need a few minutes to establish the connection with your inverter. If everything went well, it should look like this:
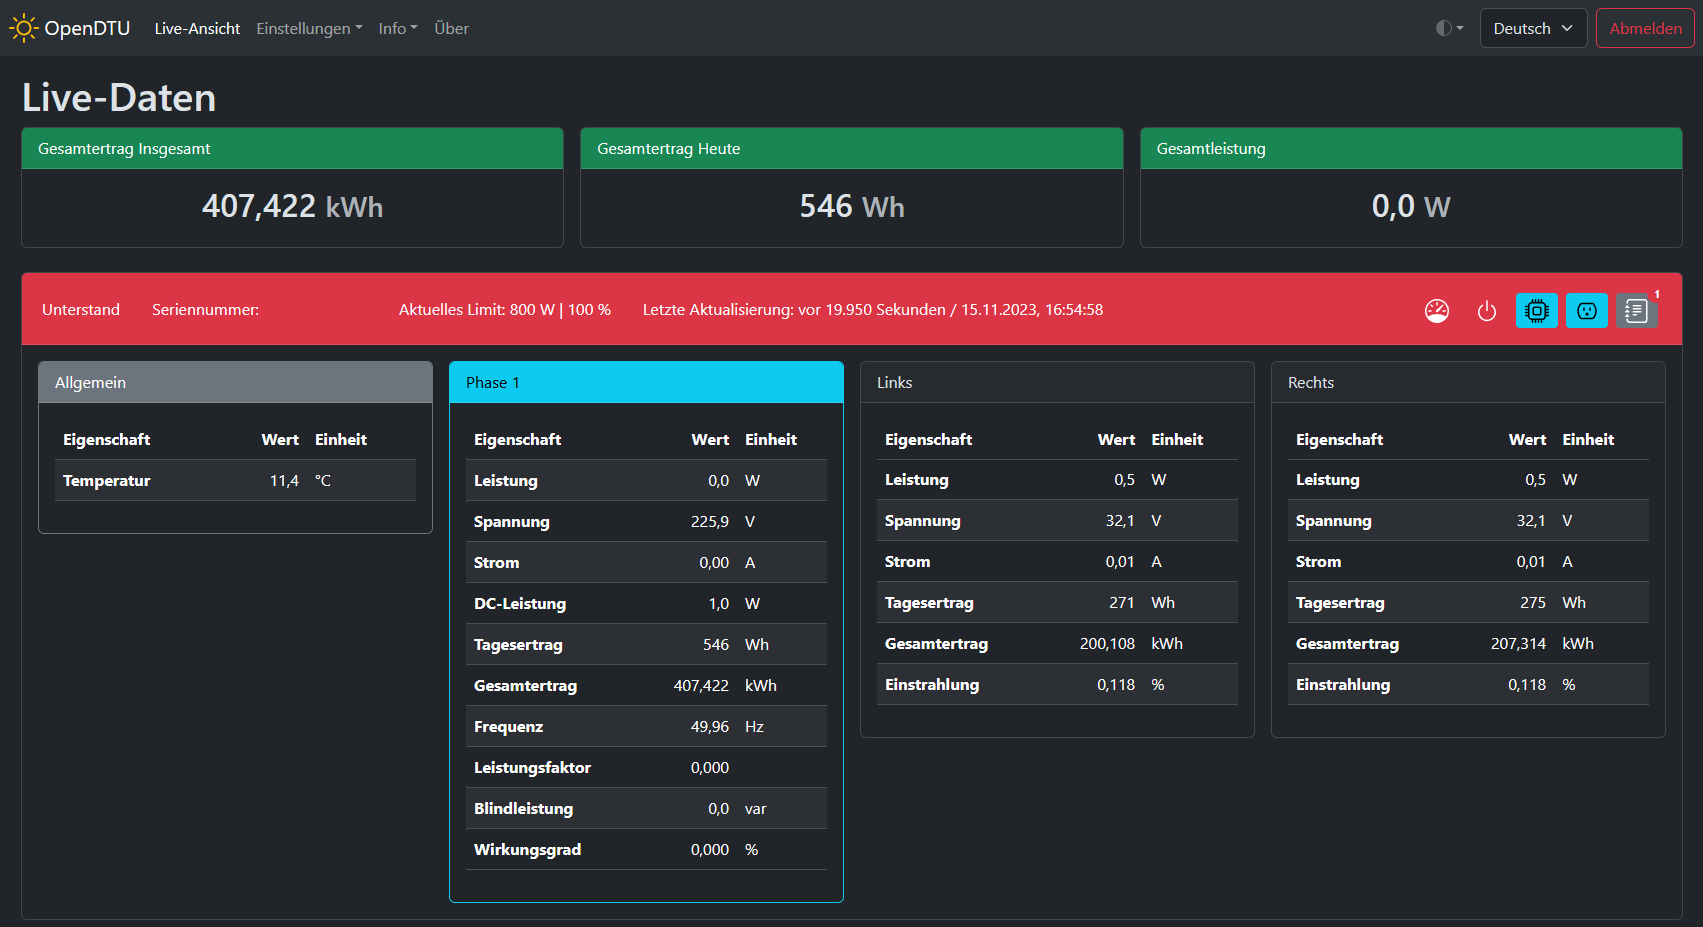
I am currently in the evening, which is why no connection to the inverter can be established. This is completely normal, as the inverter is only powered by the current from the panels.
That's actually all there is to it. Now you have successfully connected your inverter digitally and can always read the values.
Integrate OpenDTU into Home Assistant
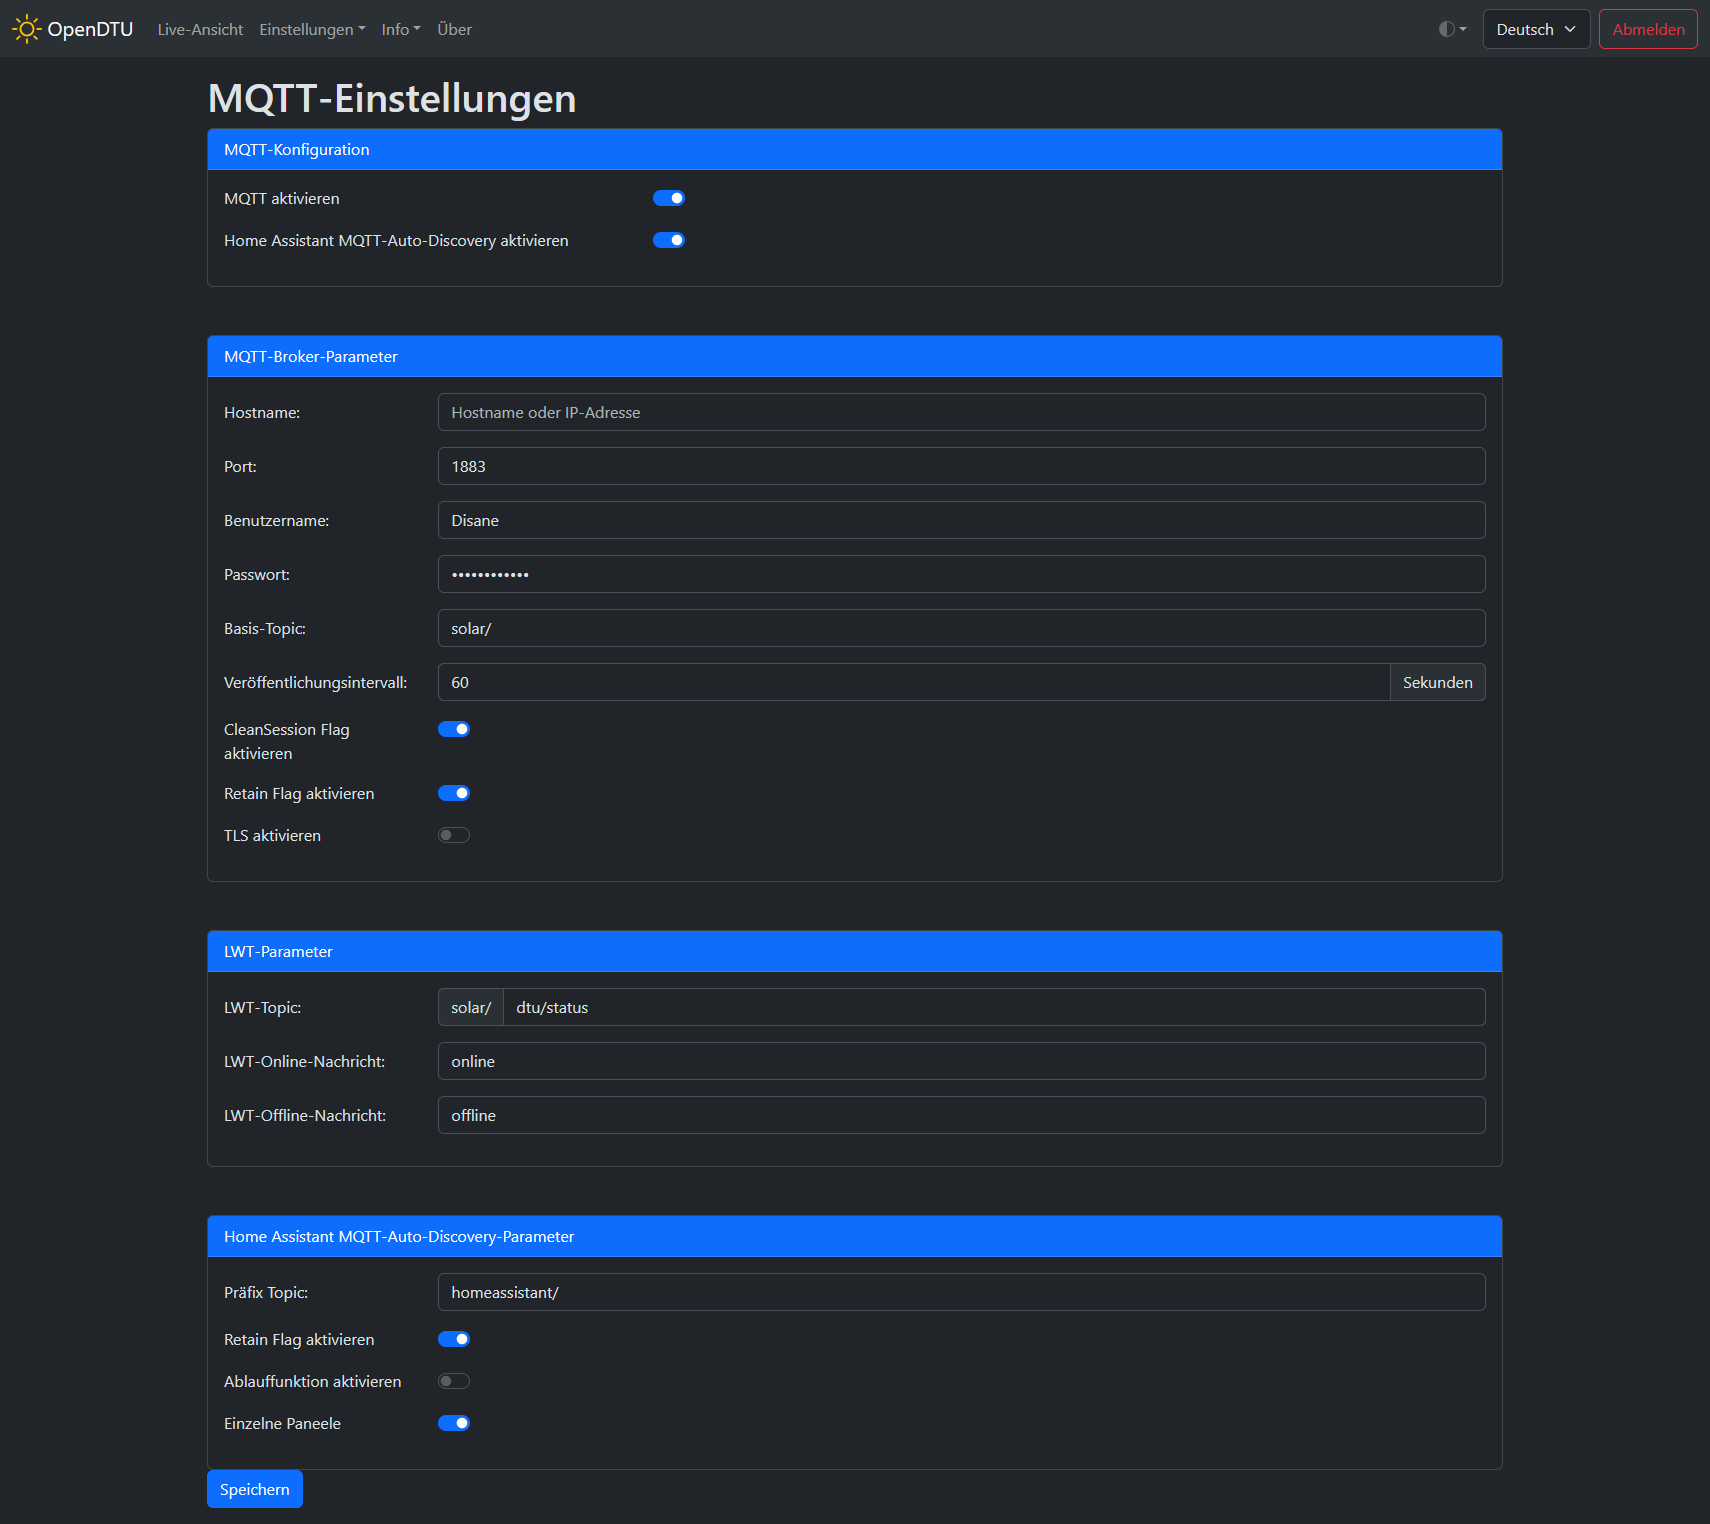
As also described in my article "Making analog gas and water meters smart", OpenDTU also offers an MQTT interface. Here, too, there is a Home Assistant Discovery that can be switched on. Simply enter the data of the MQTT broker and that's it:
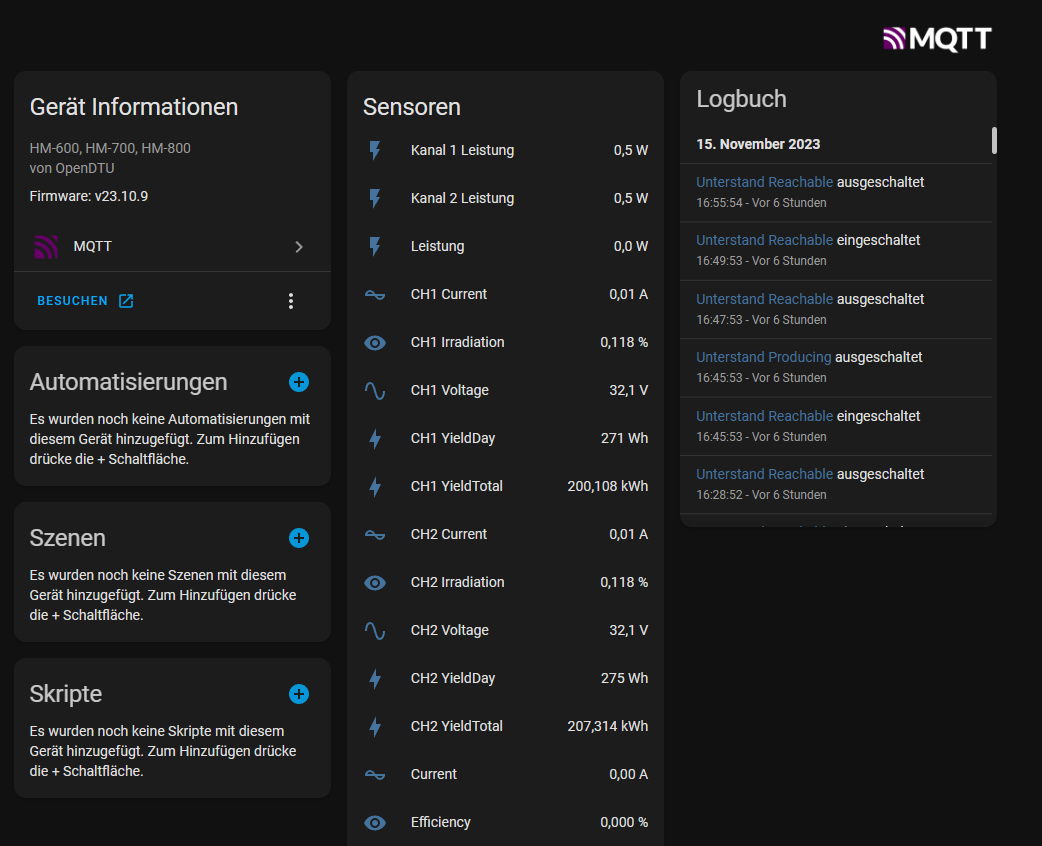
After this, the inverter should now appear as a device in the Home Assistant and have all parameters created as entities:
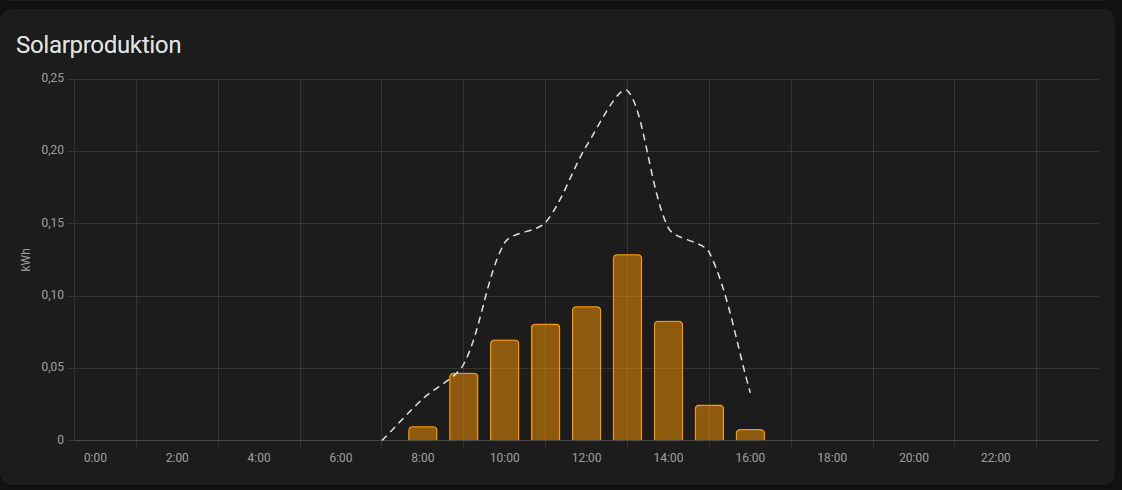
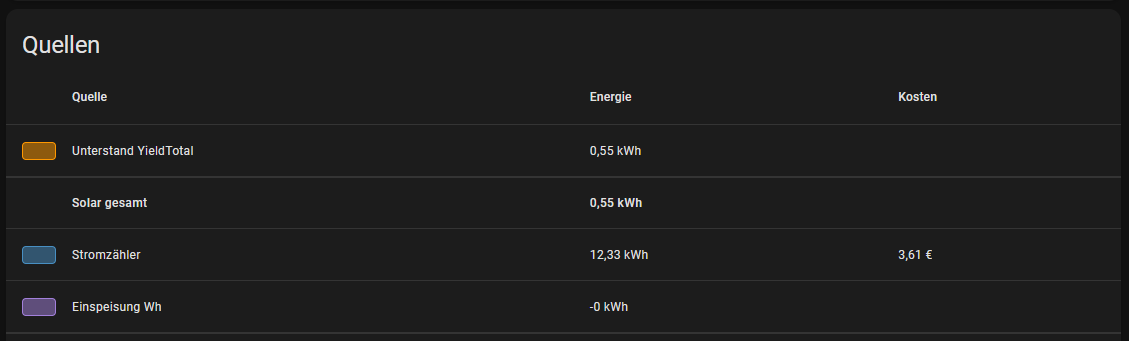
This can then be used to run useful automations and also record the generation/feed-in in the Home Assistant energy dashboard. This way, you always have a good overview of what your system is doing and what energy costs you are saving with the electricity you produce yourself:
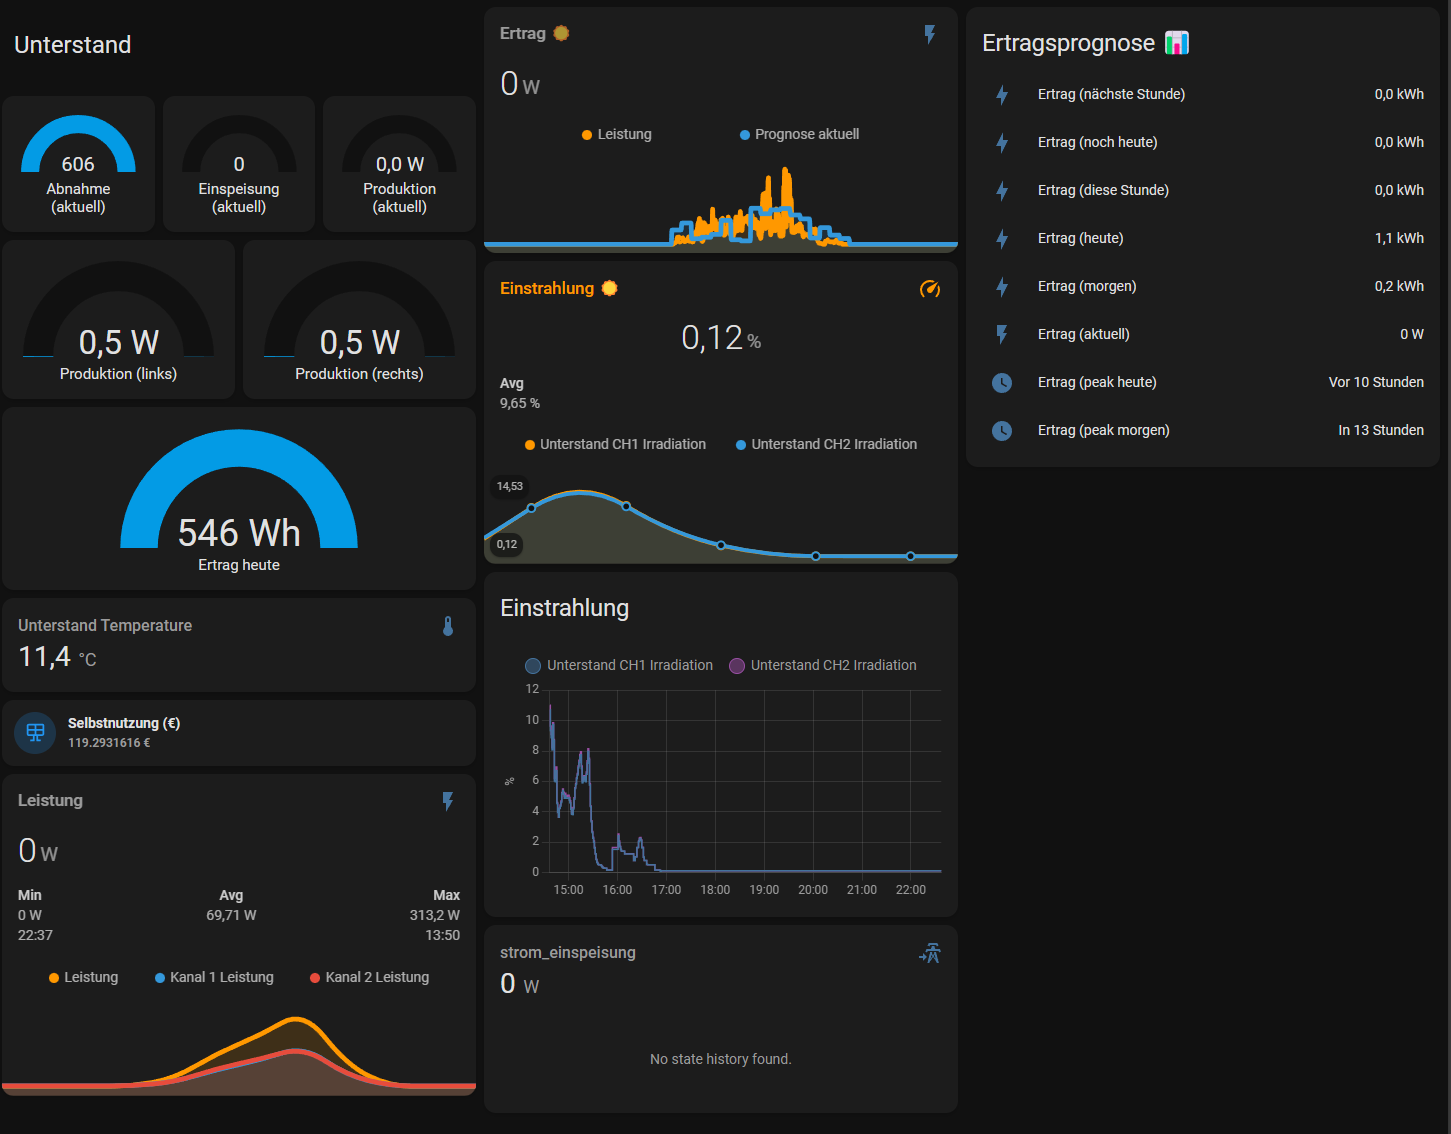
Dedicated tab in the Home Assistant for the PV system
So that I always have all the parameters in view, I have also built a nice dashboard in the Home Assistant for it:
For the yield forecast I use the integration "Forecast.Solar":
 Home Assistant
Everything else should be possible to implement with Home Assistant board tools. I have exported the dashboard for you and stored it as a Gist on GitHub if you are interested.
Have you managed the setup and now have your inverter visible in the WLAN at all times? Let me know in the comments 👇