
Since I got my 3D printer, I've been using it almost every day. To save electricity, I switch it on and off automatically via a smart socket as soon as the print is finished. I have already described exactly how to do this in another article:

Only this time we're not just monitoring the 3D printer (yes, I do that too), but we're explicitly switching it on or, in this case, off.
Integrate your own computer into Home Assistant
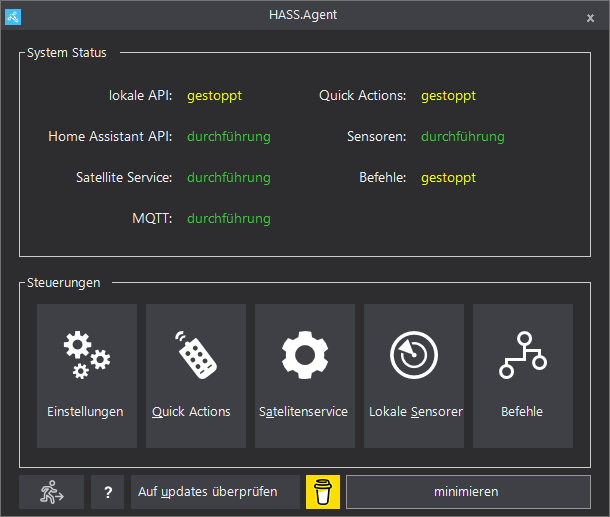
In order for Home Assistant to know that we have started an application on the computer, we need to install a tool that connects to Home Assistant and also sends telemetry data to Home Assistant. The tool is called "HASS.Agent":
 LAB02-Research
https://github.com/LAB02-Research/HASS.Agent
The nice thing about the tool is that it connects to your Home Assistant and exchanges data with it. This allows you to carry out automations when certain things happen on your computer, receive push notifications and much more.
For this to work, you need an MQTT broker that must be configured in the tool. I'll just assume that at this point.
In the tool, you can create sensors on/from your computer, which are then sent to Home Assistant:
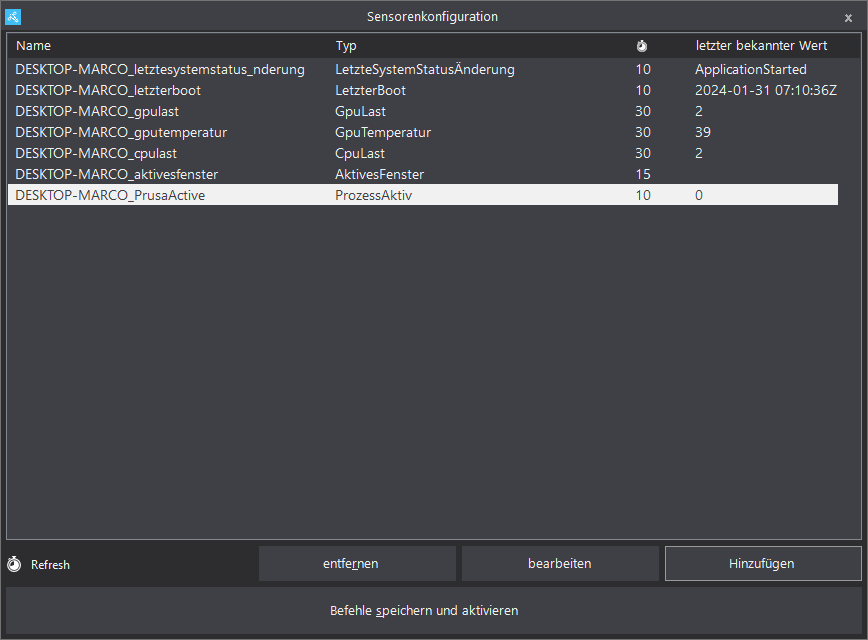
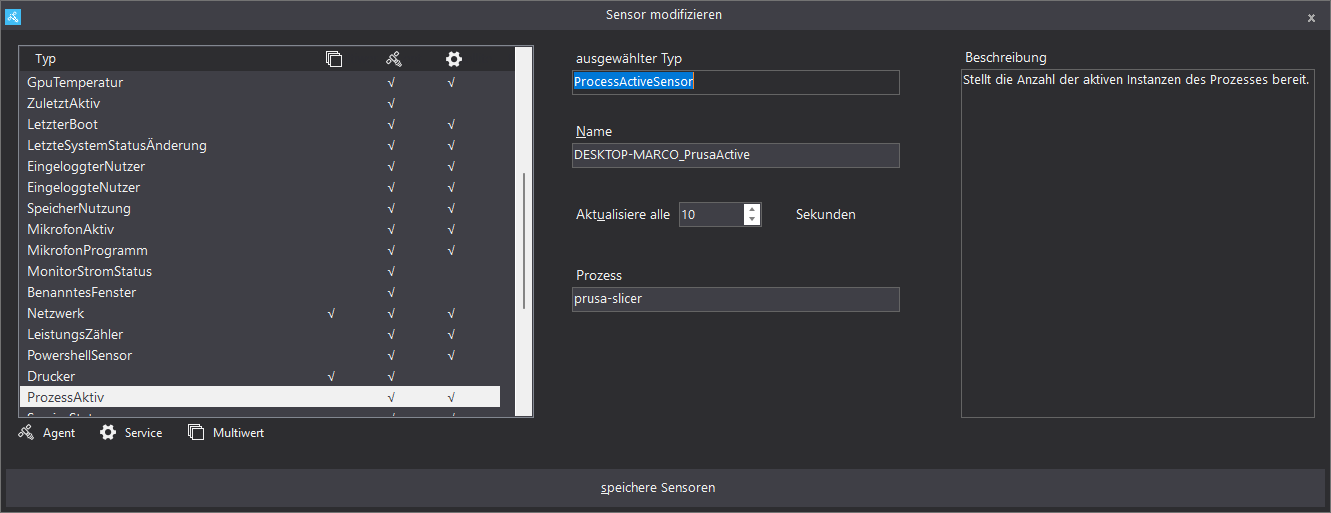
Now we add new "Local sensors". It is important here that you add the type "ProcessActive" and set the appropriate process name for your slicer:
The automation 💡
The values set above now automatically end up in Home Assistant in the integration MQTT with the name of your computer:
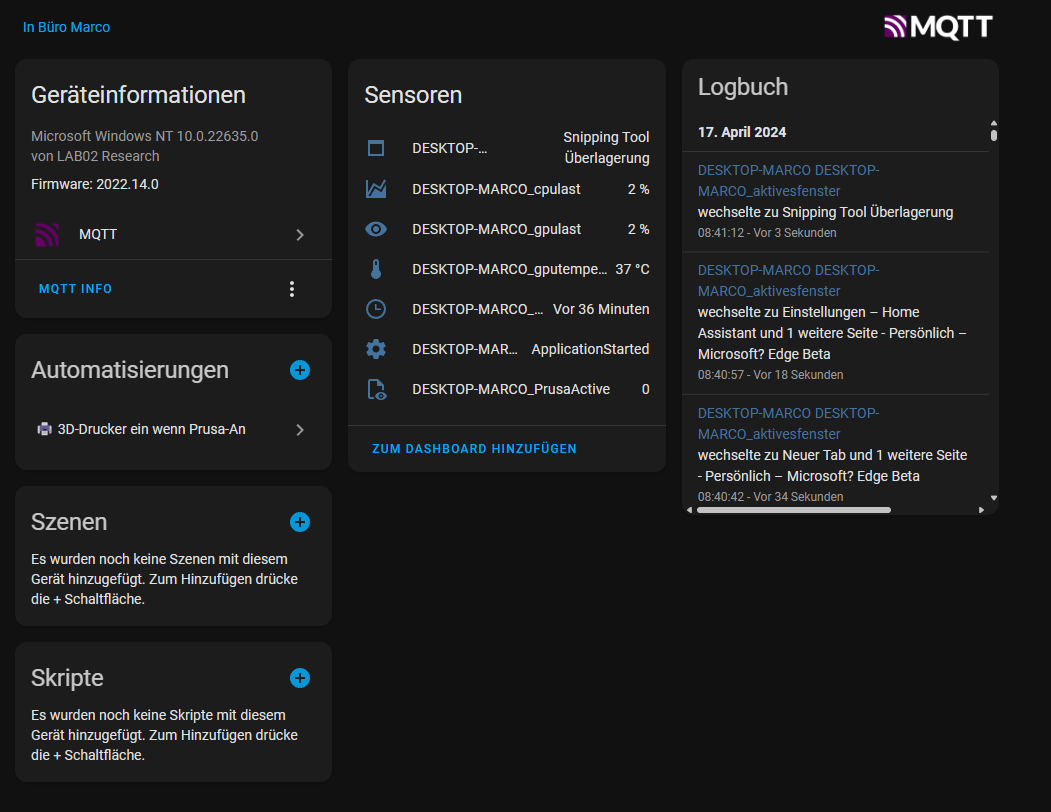
With the matching entity sensor.desktop_marco_desktop_marco_prusaactive you can then create your automation:
alias: 🖨️ 3D printer on if Prusa-An
description: ""
trigger:
  - platform: state
    entity_id:
      - sensor.desktop_marco_desktop_marco_prusaactive
    from: "0"
    to: "1"
condition: []
action:
  - service: switch.turn_on
    data: {}
    target:
      entity_id: switch.smart_plug_2210126702180251200148e1e9aac535_outlet
mode: single
Important:
Please customize the entity for your smart outlet (the part at switch.smart_plug_2210126702180251200148e1e9aac535_outlet according to your outlet entity).
That's it! 🔥

Conclusion
As you can see, it is quite easy to transfer data from your computer to Home Assistant and then use it to perform the corresponding automation. But you are not limited to the process name. You can use it to do various things and "mine" data.
You can also use the tool to remotely control your computer, switch it off, open pages or even execute Powershell scripts. What more could you want? 🤭
Why automate 3D printer power?
3D printers consume power even in standby mode, between 5 and 15 watts depending on the model. Over a year, this adds up. By automating control via a smart plug, you save not only power but also the walk to the printer: As soon as the slicer opens, the printer is ready by the time you have your G-code prepared.
Extension possibilities
The automation can be expanded further: After a print completes, the printer could automatically shut down after a cooldown period. A Pushover notification when the print finishes is also a useful addition. Combined with a camera, you can even monitor print progress remotely.
Further reading
If you enjoyed this article, you might also find these interesting: