

If you use Home Assistant, you have usually already created many things or devices in Home Assistant. However, there are some use cases where you want to carry out automations (and corresponding actions) in Home Assistant, but these are not triggered by Home Assistant itself. This is where WebHooks come into play.
What are webhooks
In essence, webhooks are nothing more than API endpoints. You can find out exactly what API endpoints are in my introduction to REST APIs 👇

These defined endpoints are provided by systems, in this case Home Assistant, and (usually) expect a predefined structure.
So we can pass data to a system and feed the other system with data or indicate that an action has just been performed.
I myself use such a WebHook in n8n (I have already written an article on this) to send a notification to my cell phone via Home Assistant when I publish a new blog article. Since I plan many articles in advance, it's always nice to see that an article has been posted.
How are WebHooks defined in Home Assistant?
In Home Assistant, it's quite easy to define WebHooks. All we need to do is create a new automation and select "Webhook" as the entry point.
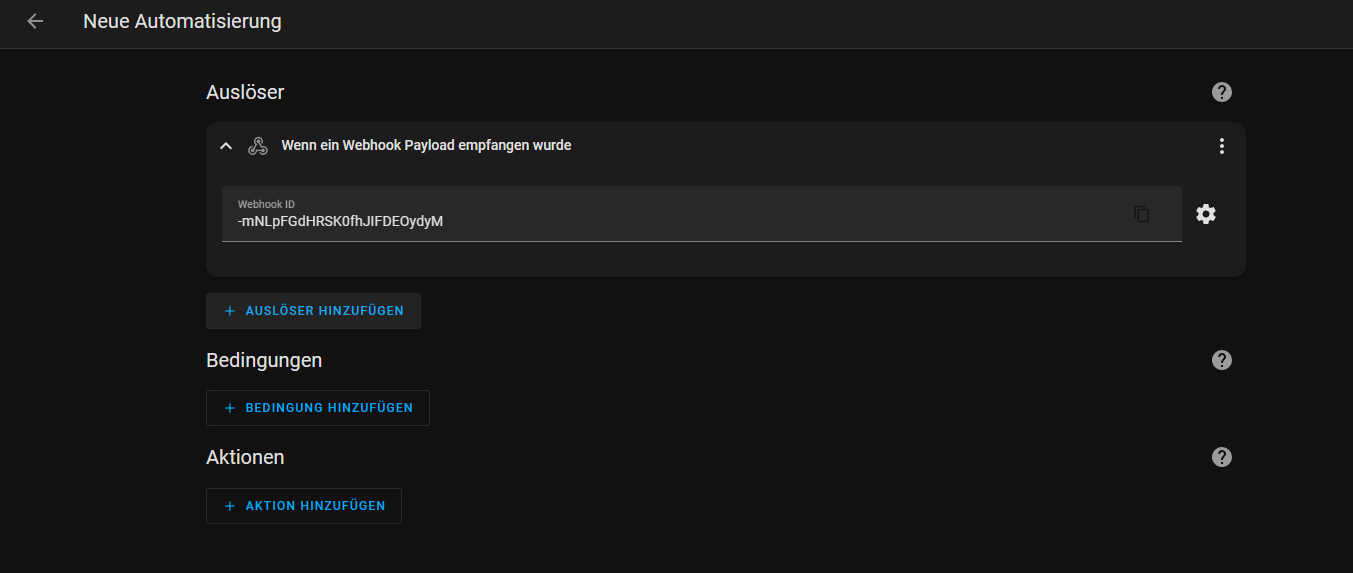
Each of these WebHooks is then given a fixed ID with which it can be accessed. With Home Assistant, the WebHooks are always specified as POST or PUT, so that data can also be transferred there. A GET would have the disadvantage that you can only deliver data via the query string.
This means that we could access our WebHook as follows:
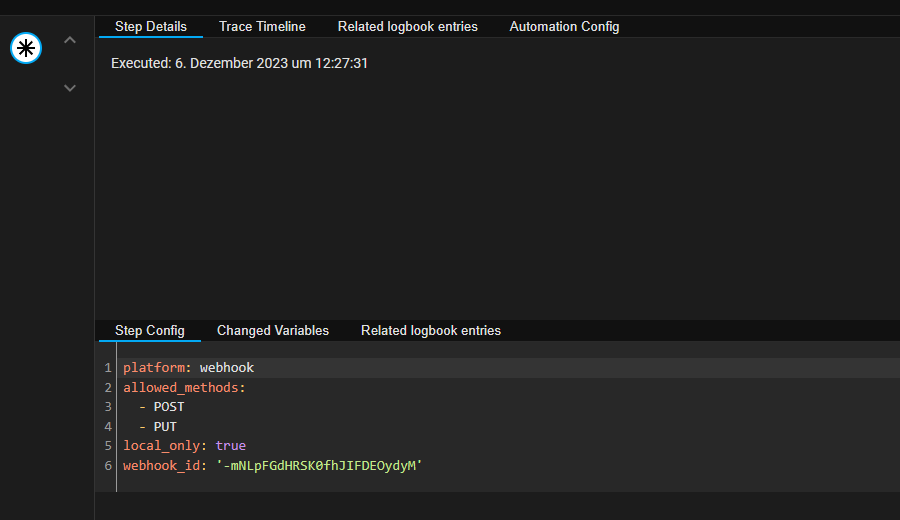
POST https://homeassistant.local/api/webhook/-mNLpFGdHRSK0fhJIFDEOydyMIf we now fire the request with cURL, we will see our request in the automation processes:
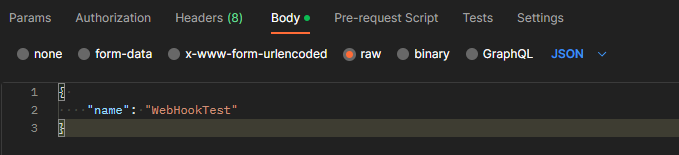
If we also provide it with data as JSON in the body, we will also see this:
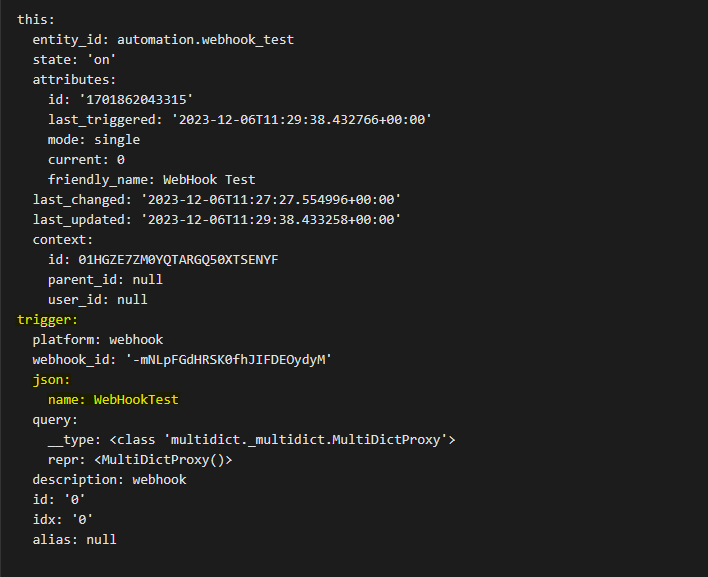
In the automation itself, we have our data in the trigger. In a Home Assistant template, we can access it with {{ trigger.json }}.
We can then use this data to fire a notification in Home Assistant, for example:
service: notify.notify
data:
  title: Post published 📑
  message: "'{{ trigger.json.name }}' published"
And that's your first WebHook written and ready for use.
Cheers 🤙
Webhook security
Since webhooks are HTTP endpoints that need to be reachable from outside, security is especially important. Always use long, randomly generated webhook IDs and make sure your Home Assistant is running behind a reverse proxy with HTTPS. This prevents unauthorized users from triggering your automations.
Practical webhook examples
Webhooks open up diverse possibilities: You can combine them with n8n or IFTTT to trigger an automation on certain emails, or with GitHub Actions to display a notification on your smart display after a successful deployment. Services like Pushover or Telegram can also use webhooks to send commands to Home Assistant.
Webhooks are particularly handy combined with NFC tags: Hold your smartphone against an NFC tag at the front door to trigger the "I'm home" automation that turns on lights, heating, and music.
Further reading
If you enjoyed this article, you might also find these interesting:
Discover more articles

Home Assistant mit WebHooks automatisieren
Automationen in Home Assistant durch externe Systeme feuern 🚀 Ich zeig dir wie es geht!

Warum du nur noch TypeScript nutzen solltest ☝️
JavaScript ist tot, lang lebe TypeScript! Wie TypeScript dich aktiv unterstützt besseren und zuverlässigeren Code zu schreiben, erkläre ich dir in diesem Artikel 🎉